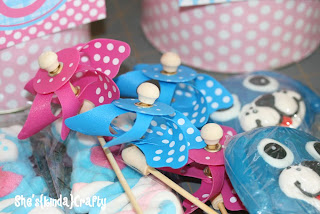
For the Puppy & Polka Dot birthday party I made 2 centerpieces for the kids’ table using large formula cans that I had sitting in my cabinet. In case you have any formula cans or other canisters sitting around (like large oatmeal containers) here is a really quick tutorial!
Supplies:
- empty & clean large can/jar/box (whatever you’ve got lying around)
- wrapping paper/scrapbook paper
- adhesive tape (I used the red tacky tape)
- tape measure & scissors/rotary cutter
- (optional) ribbon, printables, stickers
- Styrofoam or floral foam (check out the dollar store & Walmart for cheap options)
- assorted things on sticks (lollipops, pinwheels, etc)
- paper shred or moss
- glue
How to:
- using your tape measure, measure the circumference of the can & the height of the can from inside the bottom lip to bottom of the top lip
- cut your wrapping paper to those dimensions plus 1/2″ to the length (circumference) measurement
- apply a line of tape (adhesive roller, double sided tape, tacky tape) to just under the upper lip of the can, another line just above the bottom lip, and a vertical line along the seam of the can, from top to bottom
- line up the edge of your wrapping paper with that vertical seam that you created on the can with your tape, press down to seal, and continue wrapping the paper around the can, matching up the top of the paper to the top of the line of tape, lightly pressing down the paper to the tape as you g to create a nice seal
- before you finish wrapping the paper all the way around apply another line of tape directly to the edge of the wrapping paper, finish wrapping the paper around the can and press the edge of paper to the can to create a tight seal
- decorate can with ribbon or stickers or printables or a boa (oooo, that would look pretty) whatever matches your party theme (or if you are making this to hold supplies in your office/craft space decorate it to match that, too!!)
- pour a small pool of glue into the bottom of your can (hot glue, Elmer’s glue, whatever you have) and insert you Styrofoam/floral foam so that the foam comes almost to the top of the can (but not over the top) allow to dry for a little before you move on, if your using smaller pieces of foam you can stack them one on top of the other, just put a little glue between your layers
- start sticking your lollies or pin wheels or cake toppers, or fried Twinkies on a stick (mmmm)
- put a little glue down on the top of the foam and then pile on your paper shreds or moss or whatever your using to cover up the “mechanics” of it all
- step back and admire your beauty!

 |
| Pity Party |


I love a good upcycled craft!!! It looks great!
Michelle
http://www.landofthemisfittoyz.blogspot.com
So cute!What a great way to recycle 🙂
Well isn’t that cute?! We have a lot of formula tubs. I’ll have to try something similar for the baby’s first birthday!
Great way to reuse those canisters. They are so cute.
Too cute!!
Visiting from Serenity Now!
I love a good “upcycled” project!!!
Seriously adorable! Love it!
Visiting from Serenity Now!
love that you reused your formula cans! our empties are currently holding popcorn to be given out on valentine’s day! 🙂
I’m always trying to think of what to do w/ those cans. Great idea!
Visiting from Serenity Now.
Love this, I am always throwing formula cans away! Great project! 🙂
How cute is that! What a great idea – thanks so much for sharing! I’m stopping by from Amanda’s linky party.
Great idea! I love the colors too! Cute puppy!!! ;^)