If you need to bring Sharpie markers for your back to school supplies, or let’s face it, if you just want shiny new markers for yourself (because who doesn’t!) then you’ll want to head to Staples . Starting August 10th all Sharpie fine and Ultra Fine markers and highlighters will be on sale while supplies last. As you can see I picked up these 12 packs for $7 each!

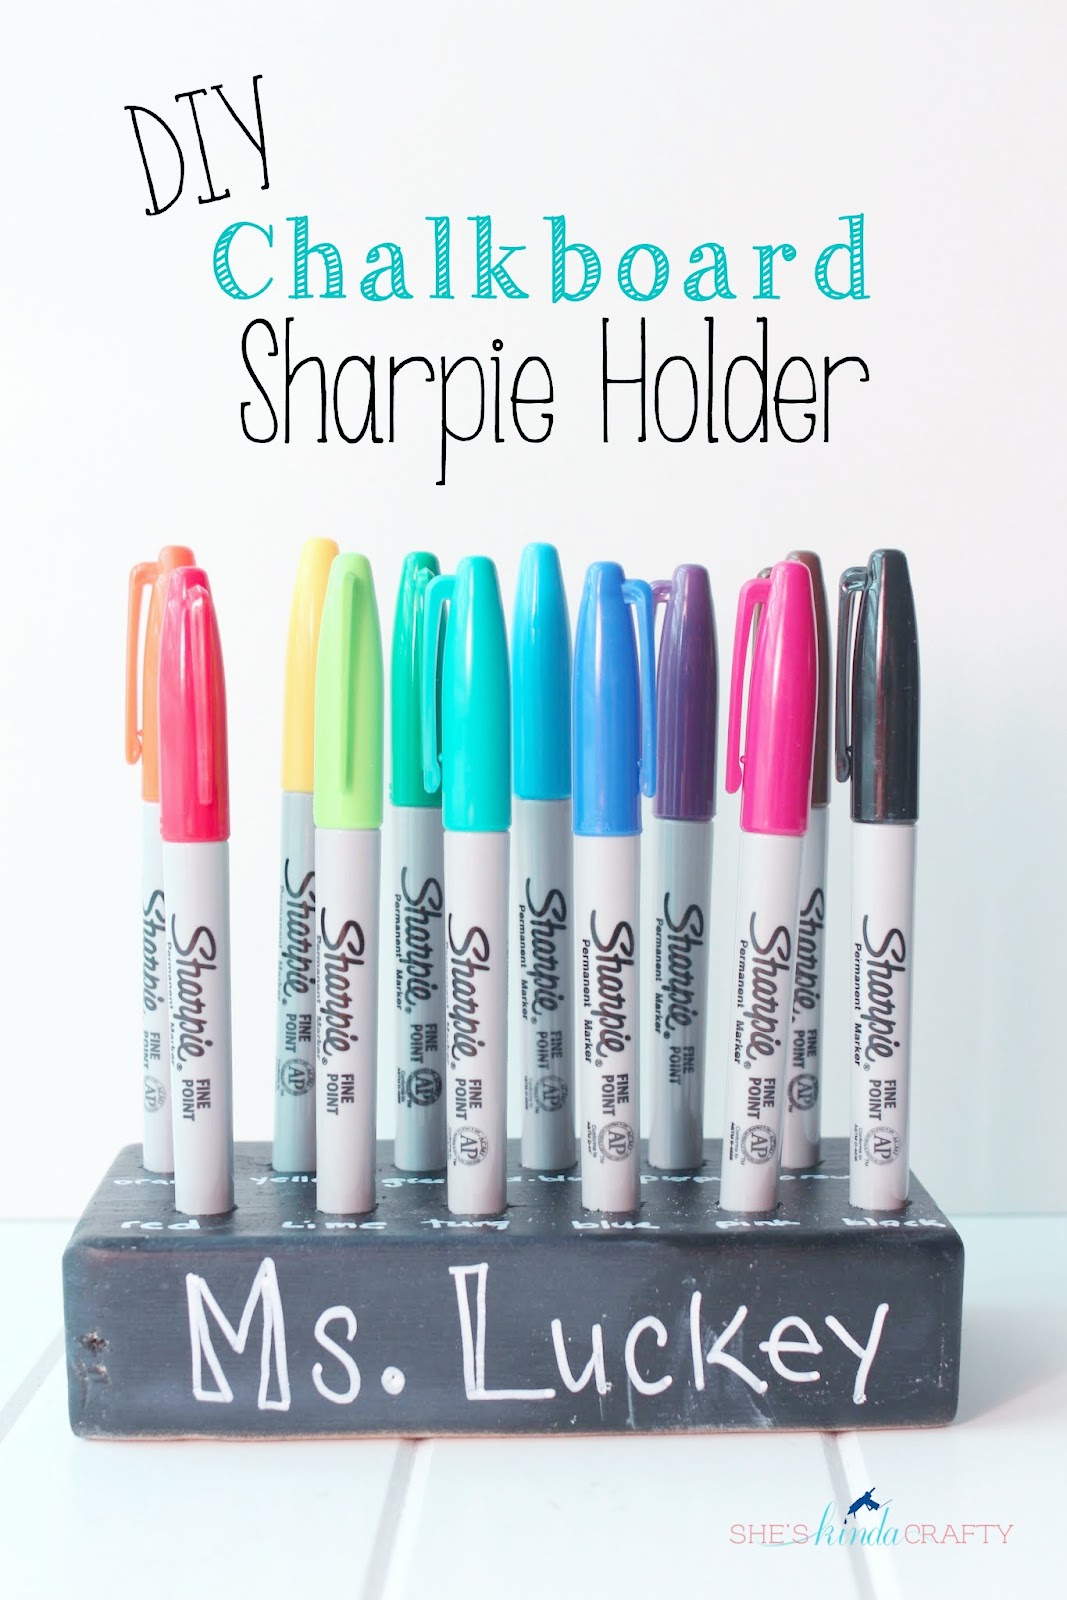
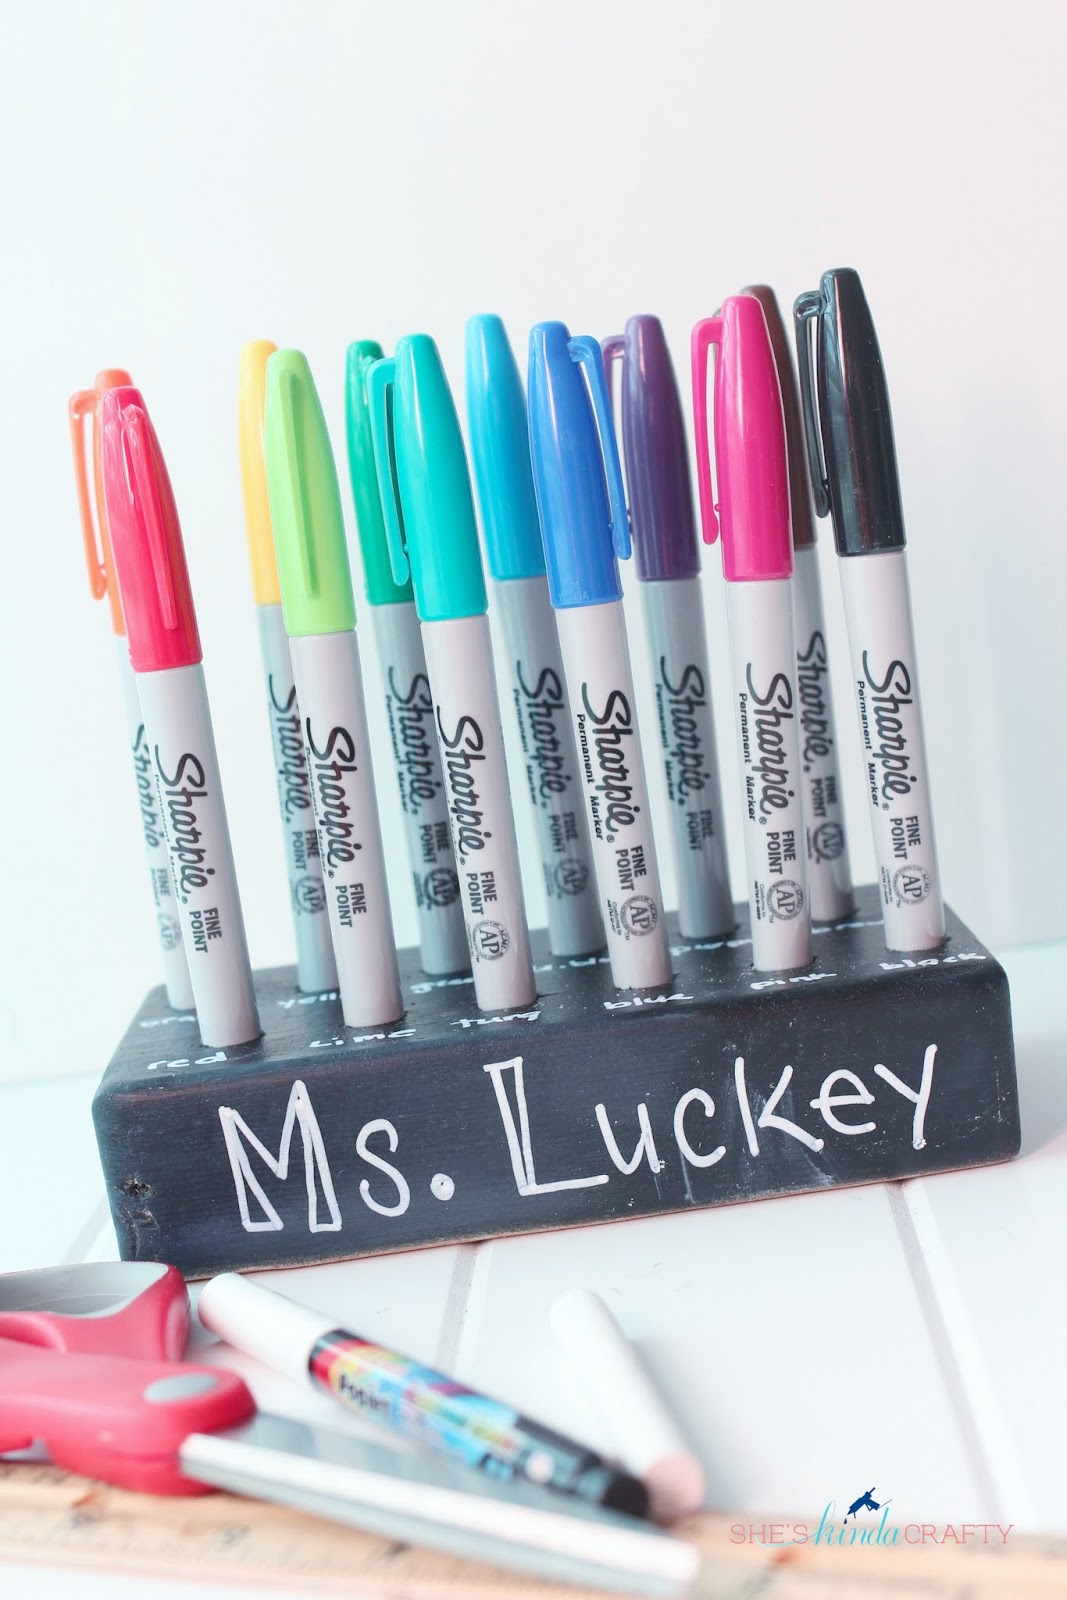
That $7 was the total price of my project. I grabbed a scrap piece of wood from the pile in our garage (you’ll need about 8 inches) and used some spray paint I found in the garage. I was going to paint this Sharpie holder Pantone’s color of the year, Radiant Orchid, originally with just a chalkboard front but I went for the all out chalkboard finish. Either way would be very pretty.
Supplies:

Step 1) measure out your drill points using a pencil, ruler, and straight edge. I wanted the back row off-center so you could see all the pretty colors.

Step 2) Cut your wood down to size. Obviously you don’t need a big fancy saw like this but since we have it, I try to get our money’s worth out of it! Don’t forget your safety goggles.

Step 3) Next you’ll need to pick the right size drill bit for the Sharpies you’ve picked out. To do this just lay your marker end to end with your bits until you’ve found the correct size.

Step 4) Now comes the fun part. Once you’ve put your safety goggles back on you’re ready to start drilling. Once again, you don’t need this big, fancy drill press. Your standard drill will do just fine, just make sure you don’t drill through the entire depth of the wood. Drill all 12 holes, exactly where you marked them.

Step 5) Sand down all the edges, including all the holes you just drilled to make sure you have a smooth, splinter-free surface. Then prep your paint area, or spray paint area in my case, and get to painting! I did 1 coat of primer and 2 coats of the chalkboard spray paint per the directions on the back of the can.

Step 6) The hardest part – you have to let chalkboard paint dry for 24 hours before it’s ready to be primed. Prime your chalkboard surface per the directions on the can or bottle which usually just includes rubbing chalk over the entire surface and wiping off.
Once you’ve finished priming the surface the holder is ready to go! I used a white chalk marker to write the teacher’s name on the front and to label all the holes with the color marker it holds. Of course you can write anything you want on it, that’s the beauty of chalkboard paint!

Isn’t that a fun way to gift a teacher Sharpie® markers? And I know not everyone may be inclined to take out your drill so I am sure your kid’s teacher would also love them presented just like this…


What a great idea and so cute! We are Sharpie OBSESSED here, lol. I can’t keep them in my desk b/c my kids steal them!
How clever and so thoughtful!
Love it! I’m intimidated by power tool projects but this turned out so awesome!
Cute idea! I am sure the teacher will love it!
How awesome is that?? I want one!! Pinned!
This is such a super cute idea! I love how it turned out.
What a fantastic idea!! Your teacher will LOVE it!
What a great idea!! I think I need one of these for my craft room!
I love this! So cute.
Super cute! I might make one of these for my own desk. I <3 my sharpies!
Great use of powertools! Neat teacher gift idea.
I LOVE Sharpies! What a great idea. I’m super jealous of all your super cool power tools!!